Tuesday, February 5, 2013

Valentine Steam Punk Heart


It's been way past time to create with clay again.  I decided to start back with a valentine inspired creation.  The heart is crafted from polymer clay, wire, glass vials and gears; I use pink tones, and brushed a pearly copper powder over all the metallic clay accents to pull the different colors together. The imbedded glass vials are filled with micro glass beads in further pink tones.   It's pretty neat, when worn the content of the vials shift around.   As always I love to use silk sari ribbon and in this case I threaded it through a vintage gold chain. Hope you enjoy and are inspired to create your own

Monday, December 24, 2012

painting is the best way


    It has been awhile since I have been creating. Life threw a time of depression and family medical drama my way.  I find that painting is the best way to get me out of my uncreative funk and start up again.  As such I have four new gloves to show off. Please enjoy.


         I wanted the birds to look like an old Victorian print that had been hand tinted


The black leather takes the longest as I have to build up thin layers of white and pastel colors for  the design background.


Saturday, November 3, 2012

Painting Gloves


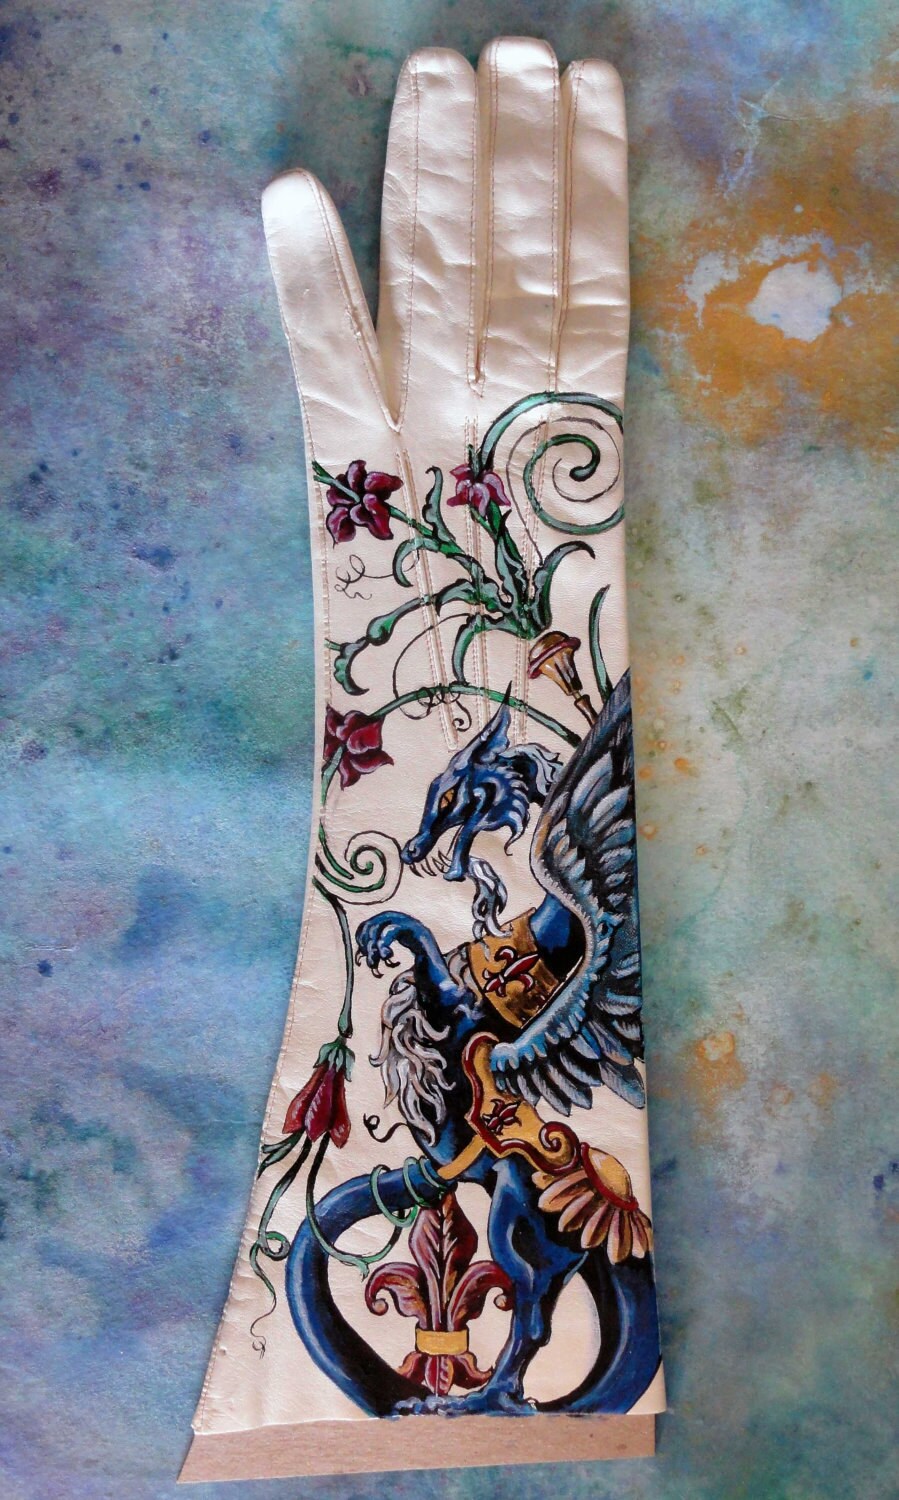
I Love vintage gloves, especially a new- old pair that have never been worn. Even better, is when it is a soft washable doe skin pair such as these. They just don't make lovely gloves like this anymore.  I have been feeling the urge to paint more gloves recently. It's the perfect project to do in the afternoon after dinner, as I can set up a little TV tray and paint away while the huby watches his shows.  I really wanted to come up with a steam punk design that had not been done as yet.   I took inspiration from a lovely Egyptian scarab that was in full wing spread.   I played up the top of the wings mechanics in an almost bone like construction and painted in some detailed wings and jewels.  Hope you like it as much as I enjoyed painting and designing this pair.

Friday, October 26, 2012

Vacuum tube necklace


So,I have these great vintage vacuum tubes and I wanted to see if they could survive the baking process of  having polymer clay added on to them. In anticipation of the carnage to come I placed the tubes on an oven safe plate and covered them with a ceramic bowl.  There were no issues what so ever. I did let them cool down very slowly so there was no shock to the glass.    I think this turned out pretty well for an experiment piece.

Thursday, October 25, 2012

Victorian assemblage chocker


I found these amazing copper findings along with some lovely old glass pearl chains from Japan, on Larks Etsy store.  When I opened my delivery and saw them I knew they had to be used together somehow. The metal finding is perfectly rusted and the links on the pearls have a great patina of greens and dark brown. I added my favorite German glass cameo and matching sugar glass drop and mounted it on a layered sari silks on the chocker.  Simple but elegant and a great example of another use for the sari silk

Wednesday, October 24, 2012

Steampunk assemblage necklace and Tears

Today was an emotional roller coaster. I craft as a form of therapy for my depression, sometimes it is too much to even think about creating ,others I can't wait to get to work.  Today I wanted to work but was in one of my crying moods. I have to laugh about it know because the whole time I was creating this piece I had tiers streaming down my face. I had to turn off the radio because each time a sad or slow song came on I would just start bawling again. I have nothing to be sad about, it's just how my emotional whirlwind of a life roles.  In fact my husband has a love hate relationship with these days, he hates to see me cry, but he loves to make me laugh and see my giggle and cry at the same time.  Any way, here is what I created today from some incredible vintage and new metal findings. I love the middle, it is a vintage pin from and artist sample, the copper is aged and rough but the rhinestones still shine and sparkle.

vintage jet glass bar pin


I have amassed a collection of vintage jewelry in different states of repair.  It is way past time I started using them or begin to find them new homes with other who will.  Today I am showing off a repurposed assemblage necklace featuring a vintage jet glass bar pin, religious medal with prayer on back and vintage rhinestone bits and pieces. It is mounted on a choker created with layers of up-cycled hand dyed sari silk ribbon.  I like to try and maintain the usability of vintage jewelry by leaving pin backs and existing elements. In this case all the chains are looped through the stick bar and alternately through the silk. This way, if wanted, the pin can be removed and reused.

Tuesday, October 23, 2012

I'm Not Sari

Please forgive my long absence from the blogging world.
I decided to start back with a quick example of how to create a ruffled wrist band from sari ribbon.  I love love love silk sari ribbon and use it often in my creations. I have been asked multiple times were I purchase and how I create my signature chokers. Here is a little taste of how I go about it all.


You will need
Sari ribbon.
 Scissors.
Glue stick
and a sewing machine or embroidery thread for hand details
sari ribbon purchased from  lifestyleinspirations on Etsy

 First you have to have a good flat stiff silk ribbon to work with. Sari ribbon comes wrinkled.  I just soak the ribbons I have chosen in cool water for a second and begin to iron out the wrinkles.

Once that's done I can begin to decide how to stack up the colors. If a ribbon is too wide just snip the end and rip length wise, this gives a strait and frayed edge.
I use a glue stick, yes just a plain old school glue stick, to give me a temporary bonding agent between layers of silk. Glue sticks do not stain or discolor the fabric as long as they are used lightly. Just swipe the glue stack the fabric and run the iron over it for a second to dry the adhesive.  


For a ruffle, sew a long stitch on your machine and pull the bobbin thread tight working down the length to form a ruffle.  I like to then dip back in the water and iron down the ruffles. This gives me a flat surface to work with and a great texture to the fabric.


Finish off with decorative stitches. On this wrist band I selected an eyelet setting for two holes and sewed a corresponding long ribbon to the other side. Just thread through the holes for a custom fit.   If you don't have a sewing machine just pull out your embroidery floss and practice your fancy stitches, the glue will keep everything in place and works as a light stiffener to aid you while working.  Also consider adding beads and charms to the middle of your wrist band for added glamour.

Tuesday, July 3, 2012

Completed commission for gloves

    For my favorite Etsy customer I created these custom gloves. They have been framed in a shadow style box and are ready to be shipped out to her tomorrow. My apologies for the glair.
Here is a detail of the first glove I finished in the set


Monday, July 2, 2012

One Last assemblage piece

       I am about to pull out the polymer clay and start working on new pendants and designs. But before I commit to the clay, I had to create one last assemblage necklace. I added vintage glass and crystal rhinestones, that were already in their own brass settings, to a modern military inspired element. I used old chains and pearls to dangle down almost like this was a hanging epilate.  Then I wire wrapped beads to make a pretty rosary style chain.  Simple but pretty.  Hope you all enjoy.

Friday, June 29, 2012

vintage assemblage pieces

    I have been having fun creating vintage assemblage pieces lately, but starting back today I am pulling out the clay and creating new steam punk designs. Please look back to see them as they emerge from dreams to reality.

Thursday, June 28, 2012

Creating an embellished cuff


Goodness, but it was a lot more labor intensive than I thought. 
 I started out by wrapping a metal cuff base in two layers of cream wool felt. I sewed the felt closed on the top and started decorating in the middle adding on the large glass cameo set in a metal finding. For extra stability I decided to sew everything I could on the wool felt using jewelry floss.   I do not regret sewing on the embellishments, but boy oh boy ,it took forever to get everything in place.   I used a light glue to hold the Rhine stone chains in place as I determined their lay out and then sewed them on as well. From there I added a few items such as a mother of pearl dove pin and vintage earrings.  Last I filled in all the blank areas with medium and small pearls topped with ab crystals.    I believe it turned out lovely but I don't think I want to do it again anytime soon.  
 Let me know what you think and any hints on how to make the next one a bit less labor intense


Wednesday, June 27, 2012

The hardest thing to do is start back up what you have left sitting for far to long

I would like to thank everyone for their patience. I have been having hard time with my depression lately it ruled me for far too long, putting my life and crafting on hold. Finally I see some light and am able to create lovely things to give to the world. Please enjoy


Friday, February 3, 2012

Profit or pull even?

I just did one of the hardest things I have yet to face on ETSY. I took a serious look at my prices and had to change then appropriately.  It all started when I began to restock my craft room. I have run out of so many items and was in desperate need of crafting supplies. But when I drained my pay pall account and realized I still needed more and had dropped nearly 250.00 I was shocked beyond belief. For one, that's a lot of money. I still didn't get everything, and I spent all my profits that quick.
                 I realized I had been under pricing my items so badly that most were just barely covering cost.  I have always prided myself in having fair to low prices, but realized I could not continue creating if I didn't actually make a profit. I took a look a polymer clay and vintage finding necklace to calculate.
Sold for 27.75
About four dollars in fees between etsy and pay pall                                      4.00
Five dollars in polymer clay used                                                                               5.00
Six dollars worth of vintage beads and findings                                                  6.00
Three dollars in modern findings                                                                               3.00
A dollar and a half in branded packaging to send it out                                    1.50
Let's say in paints sealers pigments est. three dollars worth used                              3.00
And then I try to add a complimentary gift valued at five to ten                  5.00                                                                                                                                                                                                        ----------
This totaled is                                                                                                                    27.50
                I made twenty-five cents in profit, but when you consider I spent a total of four to five hours creating it. Paid minimum wage at 8.00 an hour totaling labor cost at 40.00.  I lost 39.75  
So in reality I have been grossly cheating myself and my family of both time and money. Something I can no longer do. I have to create, its not only part of who I am but necessary for my therapy and treatment of disabilities. But to continue on ETSY I have had to raise my rates to include at least half the time I spent creating each item.
I would have had to charge 67.50 on said item to pull even and additional for a profit. I could not bring myself to raise my prices so high even after reviewing, but at least now I will make sure that the high quality supplies I use and a portion of my time spent can be recovered.
I hope everyone understands and I do not lose too much business
Please let me know your opinion on the subject.

Tuesday, November 22, 2011

When the wind blows the cradle will rock


                I really don't know where I get these ideas. When I create I have to start somewhere. On this, it was seeing these cute little doll house babies on clearance at hobby lobby.  The only problem was when I pulled them out of their pink and blue blankets, they were ugly, I mean really ugly with bug plastic flashing, poor paint job, and creepily real skin tone. So nail polish to the rescue. I pulled out my teen's requisitioned black nail polish and painted on two coats. While the second coat was still wet, I dipped the little baby in a bottle of gold pearl powder. With surgical precision I whipped out the dreamel and pierced him through the toushey. Yes I put a big hole in his little toushey to string him into the wire wrapped birds nest.  I don't like to throw anything away I may one day use and the birds nest was a great way to use up the end of the spool wire bolts and pre-bent pieces I keep in a little jar.  The blossoms are transparent fimo clay rolled through a pasta machine and cut out with tiny cookie cutters. I detail them with a rounded edge tool and dry brush with oil paints. A few metal findings such as leaves from B'sues boutique. And a few yards of dyed ribbon latter and my baby is snug in a nest on a flowering bough.
Suppliers on etsy used in this creation


Friday, November 18, 2011

Repurposed gloves go fingerless


I found some lovely vintage leather gloves. But unfortunately the fingers were in bad shape. I hated to leave them at such a good deal and purchased them any way. They sat staring at me rejected and separated from the more pristine pairs. I couldn't figure out what to do with them until I was looking at some winter fashions and went Ah-Ha fingerless gloves. So with scissors in hand I bravely cut into the soft leather praying that the stitching did not unravel at my mere thought of shearing their grungy fingers off. I reinforced the stitching with a bit of handy sewing and began to paint them as singles instead of pairs. I figured this would appeal to the younger crowd and give a chance to make some more modestly priced products for my etsy sight. I think they turned out great, I bribed my beautiful daughter with a BBQ dinner, and she modeled the gloves and several necklaces. It was a great afternoon chatting and fussing with her hair for the camera.


Isn't my baby pretty? I need to get a more professional background and better lighting for body shots.

Tuesday, November 15, 2011

The Importance of Flow

 The base is an ironed sari ribbon hand stitched around a stiffener fabric and attached to a lobster chain length for costume fit. I spent hours sewing the silk ribbons to the base in the layered ruffle pattern. I wanted it asymmetrical so one side is fluffy with ruffles and the other is more subdued with gold flowers peeking from between silk ribbon petals.  The middle is one of my sewed elements starting with a vintage filigree base that I outline in silk ribbon ruffles and then fill from the upper left side starting with the large rose and work out and around. I found when adding elements to the base you need to have a flow as the pieces will lie down and face different directions. It's important that the way they lay looks organic and like a composition in a painting leads your eye to the focal points of your work. In this case if you study the beads you will first be drawn to the large rose but with the other floral elements facing outwards and down your eye is drawn to the bird and from the dripping chains to the right and on to the silk and gold flower band around the neck.   This direction trail is something we jewelry designers often do instinctually creating a focus and having different element lead to and from. It creates a visual rhythm and is pleasing to the eye and subconscious mind making some jewelry designs more pleasing than other. So the next time you look at your jewelry and go why is this just not working think about where your eye focuses first them travels. Is it running all over the place randomly or is it flowing from one place to the next being gently led? Than try and rearrange or add bits that direct your interest from one place to another more smoothly. This doesn't have to be big changes but maybe and extra bead that creates a pattern of line in your work connecting one place to another and makeing a path for your eye to follow.


Brighten up the November blues


Everyone around me can tell I have a bad case of the November blues. I'm tired all the time, have no incentive, obsess about things and worse I can be happy and then start crying at the least little sad, touching, or cute thing. It's Like month long PMS. Strength and patience for my husband have been added to my nightly prayers as well as thanks to the Lord he has been able to put up with me so far. So I decided if I was going to obsess about completing a project ,it was going to be a bright cheerful frilly one.  I found this adorable gold sparrow from B'sues boutique as well as some floral components from her sights and matched them with my favorite dyed ribbon in abalone. Using up the last of my pinks and purple beads, I set upon this at 7:00 am and finished around midnight. I did take breaks since my fingers went numb quite a few times and I had to eat to stop them from shaking but Single minded obsession spurred me onward till now today I  am forcing myself not to touch any crafts and instead do housework and relax.  My mental state can be a rollercoaster ride of weeks of non production and then weeks of crazed crafting. The trick is to try and moderate myself so I actually can take care of my physical state as well as the mental and spiritual.  But putting my moodiness aside and focusing on the craft, I think this is my favorite so far. It is definitely frilly.

Monday, November 14, 2011

Insomnia the way to get stuff done


Yes, I was struck once again by the mind whirling monster called insomnia. A time when I can't sleep because my mind will not shut up. We have all been there. Me, I know my monster by name and leave him cookies out to munch while we converse on the subject of the day. Luckily insomnia often leads to me finishing my projects. Mainly because there is only so much late night info-mershals you can watch before you actually start to head for your credit card. My credit card is literally locked up for this reason alone.  So me, insomnia, and some really excited perky sales men often spend our nights working on crafting projects until my hand shake and my eyes can no longer focus. Bless my husband for coming into the livening room at three and four thirty in the morning to lead me to bed.  Last night's insomnia driven craft project was working on the beaded chain elements and how they hung around the focal and neck. What do you think?

Sunday, November 13, 2011

Sunday's project two headed Lion Dragon


      I used a two headed dragon finding from B'sues boutique and gathered around it a garden of glass flowers, crystal drops, and additional metal findings. The lovely red toned ribbons sewn around the edge are from Goldenonetwo. I use a heavy quilting thread to literally sew the ornaments on to a filigree backing. I have had no issues using the double strength quilting thread in this manner as long as short lengths are used, no more than two feet at a time to discourage fraying from friction.  Afterwards I will randomly dot the back with small amount of glue for extra security over the threads. This is the central pendant around which I will hand lengths of beaded chain and ribbons to finish.  At this moment my fingers are already cramping from working on this little beauty and completion will just have to wait.