Tuesday, October 23, 2012

I'm Not Sari

Please forgive my long absence from the blogging world.
I decided to start back with a quick example of how to create a ruffled wrist band from sari ribbon.  I love love love silk sari ribbon and use it often in my creations. I have been asked multiple times were I purchase and how I create my signature chokers. Here is a little taste of how I go about it all.


You will need
Sari ribbon.
 Scissors.
Glue stick
and a sewing machine or embroidery thread for hand details
sari ribbon purchased from  lifestyleinspirations on Etsy

 First you have to have a good flat stiff silk ribbon to work with. Sari ribbon comes wrinkled.  I just soak the ribbons I have chosen in cool water for a second and begin to iron out the wrinkles.

Once that's done I can begin to decide how to stack up the colors. If a ribbon is too wide just snip the end and rip length wise, this gives a strait and frayed edge.
I use a glue stick, yes just a plain old school glue stick, to give me a temporary bonding agent between layers of silk. Glue sticks do not stain or discolor the fabric as long as they are used lightly. Just swipe the glue stack the fabric and run the iron over it for a second to dry the adhesive.  


For a ruffle, sew a long stitch on your machine and pull the bobbin thread tight working down the length to form a ruffle.  I like to then dip back in the water and iron down the ruffles. This gives me a flat surface to work with and a great texture to the fabric.


Finish off with decorative stitches. On this wrist band I selected an eyelet setting for two holes and sewed a corresponding long ribbon to the other side. Just thread through the holes for a custom fit.   If you don't have a sewing machine just pull out your embroidery floss and practice your fancy stitches, the glue will keep everything in place and works as a light stiffener to aid you while working.  Also consider adding beads and charms to the middle of your wrist band for added glamour.

Tuesday, July 3, 2012

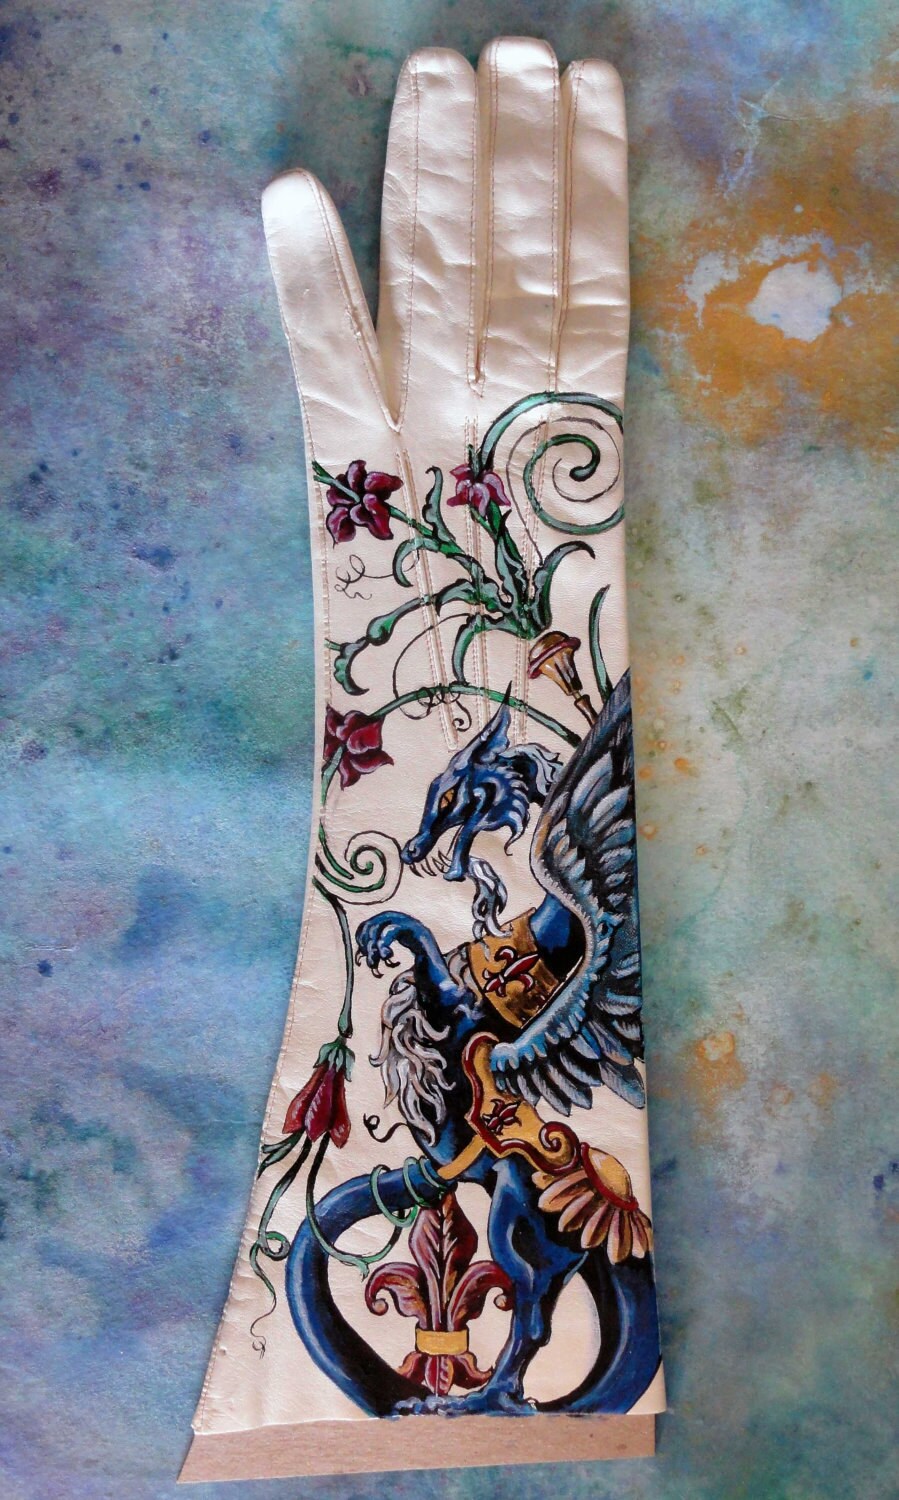
Completed commission for gloves

    For my favorite Etsy customer I created these custom gloves. They have been framed in a shadow style box and are ready to be shipped out to her tomorrow. My apologies for the glair.
Here is a detail of the first glove I finished in the set


Monday, July 2, 2012

One Last assemblage piece

       I am about to pull out the polymer clay and start working on new pendants and designs. But before I commit to the clay, I had to create one last assemblage necklace. I added vintage glass and crystal rhinestones, that were already in their own brass settings, to a modern military inspired element. I used old chains and pearls to dangle down almost like this was a hanging epilate.  Then I wire wrapped beads to make a pretty rosary style chain.  Simple but pretty.  Hope you all enjoy.

Friday, June 29, 2012

vintage assemblage pieces

    I have been having fun creating vintage assemblage pieces lately, but starting back today I am pulling out the clay and creating new steam punk designs. Please look back to see them as they emerge from dreams to reality.

Thursday, June 28, 2012

Creating an embellished cuff


Goodness, but it was a lot more labor intensive than I thought. 
 I started out by wrapping a metal cuff base in two layers of cream wool felt. I sewed the felt closed on the top and started decorating in the middle adding on the large glass cameo set in a metal finding. For extra stability I decided to sew everything I could on the wool felt using jewelry floss.   I do not regret sewing on the embellishments, but boy oh boy ,it took forever to get everything in place.   I used a light glue to hold the Rhine stone chains in place as I determined their lay out and then sewed them on as well. From there I added a few items such as a mother of pearl dove pin and vintage earrings.  Last I filled in all the blank areas with medium and small pearls topped with ab crystals.    I believe it turned out lovely but I don't think I want to do it again anytime soon.  
 Let me know what you think and any hints on how to make the next one a bit less labor intense


Wednesday, June 27, 2012

The hardest thing to do is start back up what you have left sitting for far to long

I would like to thank everyone for their patience. I have been having hard time with my depression lately it ruled me for far too long, putting my life and crafting on hold. Finally I see some light and am able to create lovely things to give to the world. Please enjoy


Friday, February 3, 2012

Profit or pull even?

I just did one of the hardest things I have yet to face on ETSY. I took a serious look at my prices and had to change then appropriately.  It all started when I began to restock my craft room. I have run out of so many items and was in desperate need of crafting supplies. But when I drained my pay pall account and realized I still needed more and had dropped nearly 250.00 I was shocked beyond belief. For one, that's a lot of money. I still didn't get everything, and I spent all my profits that quick.
                 I realized I had been under pricing my items so badly that most were just barely covering cost.  I have always prided myself in having fair to low prices, but realized I could not continue creating if I didn't actually make a profit. I took a look a polymer clay and vintage finding necklace to calculate.
Sold for 27.75
About four dollars in fees between etsy and pay pall                                      4.00
Five dollars in polymer clay used                                                                               5.00
Six dollars worth of vintage beads and findings                                                  6.00
Three dollars in modern findings                                                                               3.00
A dollar and a half in branded packaging to send it out                                    1.50
Let's say in paints sealers pigments est. three dollars worth used                              3.00
And then I try to add a complimentary gift valued at five to ten                  5.00                                                                                                                                                                                                        ----------
This totaled is                                                                                                                    27.50
                I made twenty-five cents in profit, but when you consider I spent a total of four to five hours creating it. Paid minimum wage at 8.00 an hour totaling labor cost at 40.00.  I lost 39.75  
So in reality I have been grossly cheating myself and my family of both time and money. Something I can no longer do. I have to create, its not only part of who I am but necessary for my therapy and treatment of disabilities. But to continue on ETSY I have had to raise my rates to include at least half the time I spent creating each item.
I would have had to charge 67.50 on said item to pull even and additional for a profit. I could not bring myself to raise my prices so high even after reviewing, but at least now I will make sure that the high quality supplies I use and a portion of my time spent can be recovered.
I hope everyone understands and I do not lose too much business
Please let me know your opinion on the subject.